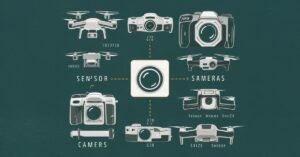
What camera is best for drones
Photogrammetry is intensely dependent on the kind of camera utilized for catching actually pictures, as this straightforwardly influences the quality and exactness of information;
Key parts incorporate sensor size, pixel thickness, and screen speed/type; your information assortment objectives can assist with directing the ideal camera for your necessities;
Figure out how DJI photogrammetry drone cameras have been designed for excellent information assortment. Drone photogrammetry has arisen as a useful asset for catching high-goal elevated symbolism to make precise guides and definite models.
While the actual robot assumes an essential part, the nature of the going with imaging gear is an urgent thought and is basic to gathering dependable information during drone reviews.
In this blog entry, we will dig into the significance of picking a quality camera for drone photogrammetry and investigate how it can raise the consequences of your ethereal information assortment and increment studying proficiency.
We’ll likewise take a gander at probably the most ideal arrangements that anyone could hope to find, including the DJI Mavic 3 Undertaking, the P1 camera for the DJI M300 Series, the Sony a7R IV which incorporates with the high-accuracy Gremsy Sprite SM planning gimbal to be utilized with the M300 Series, and the more established Ghost 4 RTK.
Kindly note that the DJI Mavic 3 Undertaking has a wide-point camera and a Tele camera. This article will zero in on the M3E’s wide-point camera, as this has been explicitly intended for flying looking over.
Picture Quality: Releasing the Force of Detail
A top notch camera is fundamental for catching sharp, nitty gritty symbolism that shapes the underpinning of precise photogrammetric yields. Various elements become an integral factor while picking a camera for drone photogrammetry, however probably the most urgent viewpoints incorporate sensor size and goal, the screen, ISO, and gap.
Settling on a superior quality camera guarantees the loyalty of the caught information and can assist with expanding the effectiveness of the mission. All things considered, clear and point by point pictures empower exact component extraction and work with the making of precise guides and models.
Sensor Size
The sensor size of a robot camera alludes to the actual elements of its picture sensor. As a general rule, bigger sensor sizes will quite often catch all the more light and result in higher picture quality – catching more detail, showing better unique reach, and performing great under low-light circumstances.
A bigger sensor size catches a bigger region in a solitary picture, lessening the quantity of pictures expected to cover a given review region. This is exhibited in the realistic underneath. The P1 camera and the Sony a7R IV (utilized with the Gremsy Imp SM gimbal for M300 RTK Series) have full-outline sensors.
Take a gander at how a full-approach sensor (orange box) can take in additional information in a solitary shot contrasted with little sensor sizes, for this situation, the Mavic 3 Undertaking’s 4/3 sensor (khaki box) and the Ghost 4 RTK’s 1-inch sensor (dark box). Similarly, the M3E’s 4/3 sensor takes in more than the P4R’s one-inch sensor.
This assists with expanding productivity – gathering more information in a solitary flight. This implies a more noteworthy region can be shrouded in one mission, or a mission can be finished faster. For example, this chart shows the productivity correlations between the P1, Mavic 3 Undertaking, and the P4 RTK – showing the distance covered during a solitary flight. The outline references GSD (Ground Examining Distance), which is a significant thought during drone photogrammetry studies, and is influenced by a few elements, including the nature of the camera and the flight height. For additional subtleties, read our manual for GSD and drone studies.
It means a lot to express that these degrees of effectiveness aren’t simply down to sensor size, however a mix of variables, for example, shooting span speed, camera goal, pixel size, and battery duration of the robot. A large number of these will be examined later in this blog. As bigger sensors by and large produce greater pictures with more detail, it is critical to recollect that handling these pictures requires more computational assets and time.
In correlation, more modest sensors with more modest picture sizes can smooth out the picture handling work process and further develop productivity at the information handling stage. In many regards, it depends which results are required:
A bigger sensor with additional pixels and better subtleties can give better information to examination, which is essential when exact estimations or point by point highlight extraction are required. In any case, on the off chance that a looking over task doesn’t require high-goal symbolism, a more modest sensor with less pixels can finish the work.
Number of Pixels
The quantity of pixels, generally alluded to as goal, decides the degree of detail that can be caught in a picture. More pixels will quite often bring about higher-goal symbolism. Yet, it is vital to express that a high megapixel doesn’t be guaranteed to mean better picture quality:
A high megapixel rely on a little sensor implies that each picture is more modest. Notwithstanding, on the other side, a bigger sensor with a bigger number of megapixels can create more exact and outwardly engaging outcomes – particularly while flying higher to increment effectiveness contrasted with different cameras with more modest sensor/less megapixels.
This is additionally helpful for catching fine subtleties, geological highlights, or recognizing little items. For example, the P1, with its full-outline sensor and 45MP abilities, can catch this degree of detail from 50m…
By similar measure, look at this beautiful diversion, caught utilizing information from the Sony a7R IV, which joins its full-outline sensor with an astounding 61MP to give this degree of clearness in 3D reproductions (picture kindness of Visualskies)…
In the interim, while the Mavic 3 Endeavor and Ghost 4 RTK have 20MP cameras, the symbolism ought to be more keen on the M3E in light of the fact that it has a bigger sensor, and bigger pixels (3.3um versus 2.4um). For example, the lucidity in this 2D guide underneath – taken from Balfour Beatty VINCI’s work on the HS2 project – shows the elevated degrees of detail that can be acquired from looking over with the Mavic 3 Endeavor.
Size of Pixels
The size of individual pixels on the robot’s sensor influences its aversion to light and its capacity to catch subtleties. Bigger pixels by and large perform better in low-light circumstances, as they can accumulate all the more light, bringing about diminished clamor and further developed picture quality.
On the other hand, more modest pixels are fit for catching better subtleties because of their higher thickness, however they might battle in low-light conditions and produce pictures with more commotion.
For example, the P1 has a pixel size of 4.4um, contrasted with the Ghost 4 RTK’s 2.4um. Look how much more brilliant the P1 picture is – top – contrasted with the P4 RTK – base – while catching a similar picture in a low-light setting. Different variables, like ISO, can likewise have an impact. Inclining further toward this later.
Camera Shutter
The shade on a camera is a mechanical or electronic gadget that controls the span of time the camera’s sensor is presented to light while snapping a picture.
Shutter Speed: Impact On Drone Photogrammetry
The shade speed controls the openness length and is urgent for freezing movement or catching wanted movement obscure. A more limited shade speed is valuable for ethereal photogrammetry as it limits movement obscure, empowering more keen pictures while moving at speed.
Fast shooting spans are likewise profitable for catching numerous pictures of a similar region – which again assists with productivity: The P1 and Mavic 3 Undertaking have a 0.7s shooting stretch, contrasted with the P4 RTK’s 2.5s shooting span.
Mechanical Versus Electronic Screen
The shade on a camera can be mechanical or electronic. A mechanical screen is an actual shade or set of cutting edges situated before the camera sensor. At the point when the shade button is squeezed, the mechanical screen opens to open the sensor to light, and after a foreordained span, it closes once more.
This cycle makes a reasonable qualification between the beginning and end of the openness, considering exact command over the openness time. Interestingly, an electronic shade doesn’t depend on actual parts. All things being equal, it electronically controls the camera’s sensor to catch the picture. The sensor is straightforwardly initiated and deactivated to control the openness.
At the point when the electronic shade is locked in, the whole sensor is presented to all the while light. A mechanical shade enjoys critical upper hands over an electronic screen for drone studying since it really kills the movement obscure that can happen with electronic shades.
Because of its synchronized and controlled catch, a mechanical screen (worldwide shade) can limit moving shade bending – or the jello impact – contrasted with an electronic screen (moving screen) to catch more exact and undistorted symbolism.
This likewise upgrades the georeferencing system, guaranteeing that each picture adjusts precisely with others, coming about in a consistent and dependable photogrammetric recreation. A few cameras offer a mix of mechanical and electronic shades, permitting photographic artists to pick the most fitting screen type for various shooting circumstances. The Mavic 3 Undertaking, P1, and Ghost 4 RTK are outfitted with mechanical and electronic shades.
The Sony a7R IV has an electronic shade, with a screen speed of 1/8000 to 30 seconds. Include rich, its shade permits quiet, without vibration shooting and an interior damper construction to ingest the effect of screen movement for at least shade vibration.
ISO
ISO decides the camera sensor’s aversion to light. In ethereal photogrammetry, it is for the most part desirable over utilize a low ISO setting (like ISO 100 or 200) to limit picture commotion and boost picture quality. Higher ISO settings can bring more commotion into the pictures, which can corrupt the precision and detail of the subsequent photogrammetric yield. In any case, it means quite a bit to find some kind of harmony, as utilizing too low an ISO setting in low-light circumstances can prompt underexposed pictures. Thusly, finding the ideal ISO setting that gives adequate openness without forfeiting picture quality is essential.
Hence, having a camera with a wide ISO setting permits you to change the responsiveness in view of the lighting conditions you are working with, giving you greater adaptability and command over your symbolism. For symbolism, the P1 has an ISO scope of 100-25600; the Mavic 3 Venture can go from 100-6400, and the P4 RTK’s reach is 100 to 12800. The Sony a7R IV’s standard ISO range is 100-32000 (ISO numbers up from ISO 50 to ISO 102400 can be set as extended ISO range). Opening:
Profundity of Field and Light Control
Gap alludes to the kickoff of the camera focal point that controls how much light entering the camera. It is addressed by the f-number. In ethereal photogrammetry, it’s for the most part prescribed to utilize a smaller opening (higher f-number) to accomplish a bigger profundity of field, as this guarantees a more noteworthy piece of the scene is in center, from close to far.
This is significant on the grounds that ethereal photogrammetry frequently requires catching pictures of huge regions, and having a wide profundity of field guarantees that every one of the items and elements inside the scene are in center and precisely caught.
Notwithstanding, it’s critical to consider the compromise between profundity of field and how much light arriving at the camera sensor. In low-light circumstances, you can utilize a more extensive gap (lower f-number) to assemble all the more light, guaranteeing legitimate openness without depending entirely on high ISO settings or slow shade speeds.
On the other hand, in brilliant circumstances, you can choose a smaller opening (higher f-number) to decrease how much light entering the camera, forestalling overexposure. Finding the right harmony between profundity of field and openness is vital for acquiring sharp and all around uncovered pictures.
Consequently, having a camera with a more extensive gap range gives more noteworthy command over elements, for example, openness and profundity of field, empowering you to adjust to various lighting conditions to catch the most ideal pictures during photogrammetry missions.
What’s more, accepting DJI arrangements as an aide, the Mavic 3 Endeavor and Ghost 4 RTK have variable gaps from f/2.8 to f/11, while the P1 has a bigger reach, from f/2.8-f/16.
Focal Length
Central length (addressed in mm) decides the amount of the scene will be caught, to what amplification and how huge individual components will be recorded. For photogrammetry, a more limited central length increments effectiveness, as more item space should be visible in one photograph, diminishing how much pictures required.
Notwithstanding, extremely short central lengths can bring about focal point twisting. All things considered, a decent central length between 24-35mm is suggested for photogrammetry. Accordingly, the Mavic 3 Undertaking and Ghost 4 RTK have 24mm comparable focal points.
In correlation, the P1 (envisioned) and Sony a7R IV proposition greater adaptability with the capacity to exchange focal points, giving flexibility relying upon the current mission.
Choosing The Best Drone Camera For Photogrammetry
Photogrammetry is extremely dependent on the kind of camera utilized for catching still symbolism, straightforwardly affecting the quality and exactness of review information. Accordingly, it is pivotal that you pick the most ideal camera for your looking over needs. DJI has perceived the worth of robots for flying photogrammetry and has designed a few answers for convey quality outcomes.
Which is best relies upon an administrator’s singular reviewing needs and prerequisites, and spending plan. Nonetheless, with their full-outline sensor, high pixel count, and compatible focal point ability – among other key elements – the P1 and the Sony a7R IV with the Gremsy Imp SM (both presented beneath – P1 on left) are extremely strong choices.
They are viable with the M300 Series (M300 RTK and M350 RTK), which is an exceptionally flexible robot which can convey a scope of payloads, including the L1 LiDAR sensor, opening the entryway for having one robot for various missions.
All things considered, the M300 Series and viable payloads are a more costly choice, contrasted with other reviewing arrangements, like the Mavic 3 Endeavor.
Conversely, the Mavic 3 Endeavor (presented underneath) packs the ideal harmony between power, compactness, and cost: More financially savvy than the M300-P1 mix, and undeniably more convenient, all while pressing in a 4/3 CMOS, 20MP, bigger pixel size contrasted with the P4 RTK, and a faster shooting stretch.
It makes it a more productive and exact arrangement contrasted with the P4 RTK – which is DJI’s past age looking over drone – and is an incredible section level robot for photogrammetry.